Disclaimer: Ok, so let's be honest for a minute, does anyone like tofu? I mean if someone says that they actually enjoy the taste of a block of bean curd then they either cannot taste or are trying to sell you something. Plus, have you ever seen anyone break open a pack of tofu and chow down? Nope. It isn't an aquired taste either. I have made my fair share of horribly bland tofu meals and I cannot deny that they tasted like cardbord dipped in soy sauce. What tofu is, is a great source of protein, but it is also a terrific sponge, and that alone makes it a versitile and easy way to get some good soy into your diet. BEWARE, to eat tofu, you have to season the hell out of it, but if done well my friends, it is fabulous! So without further ado, I give you my 1st meal!!!MEDITTOFU
SO, I just got back from a seven week stay in Rome for research, and along the way I picked up some scrumptious tips about zucchini and added arugula and spicy olive oil to my own repertoire of kitchen staples. Not to mention I indulged on my own love affair of fresh figs, and fig jam.
So in honor of my Italian inspiration I made my own verison of a tofu scramble with zucchini, shitake mushrooms, arugula and ripe cherry tomatoes!
Medittofu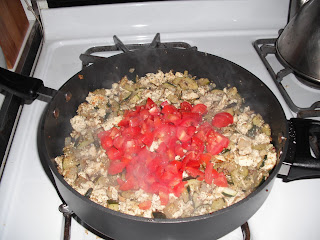
Ingredients:
1 package extra firm tofu - pressed and crumbled *
1 medium diced onion
2 cloves garlic thinly sliced
5 -6 fresh shiitake mushrooms sliced
2 medium zucchini chopped into cubes or rings
3T olive oil
3/4 cup halved cherry tomatoes
1 cup fresh arugula roughly chopped
Herbs and Spices:
I eye these, so just sprinkle till you like how it tastes!!Thyme (a heaping T)
Sea salt
Freshly ground pepper
Oregano
1/2 T good balsalmic vinegar
Heat 1 T olive oil in cast iron skillet under medium heat. Add onions and mushrooms. After about 5 minutes add garlic slices, making sure that they do not burn. Next add in the zucchini and another T olive oil, sautee a few minutes and add crumbled tofu. Stir and add remaining oil and H2o if it is too dry. Add spices. Sautee until all the ingredients begin to brown on the bottom of the pan.
I like it when everything gets a bit crispy and the tofu gets browned as well, this may take a bit of time, but it is well worth it!
Once everything is browned to y

our liking spoon layer of the mix onto a plate. Place a heap of the arugula on top, then add a heap of lightly salted tomatoes over that. Lastly, pour 1/2 T of GOOD (not the cheapest kind, try to get the sweeter one) balsalmic vinegar over the entire thing.
Result: A great tasting dose of soy! The warm bottom works nicely with the cool salad on top and the arugula gives a bit of spice to the mild flavor of the scramble.
* I don't always press my tofu. It takes time and in the beginning I could never tell the difference, but now I think that it gives the tofu a better consistency and makes it fluffy. So, if you do want to, place the drained tofu between two cutting boards and place something heavy on top (olive oil can, cookbook, mortar and pestle, whatever you have around!) for a few hours.


